Setting up Facebook Publish Wordpress plugin
This article is intended to guide you through the post installation process for Facebook Publish WordPress plugin. Please follow the instructions given below:-
1. First of all, you need to create a Facebook Application, this is described in this tutorial:-
How to generate a Facebook APP ID and Secret key
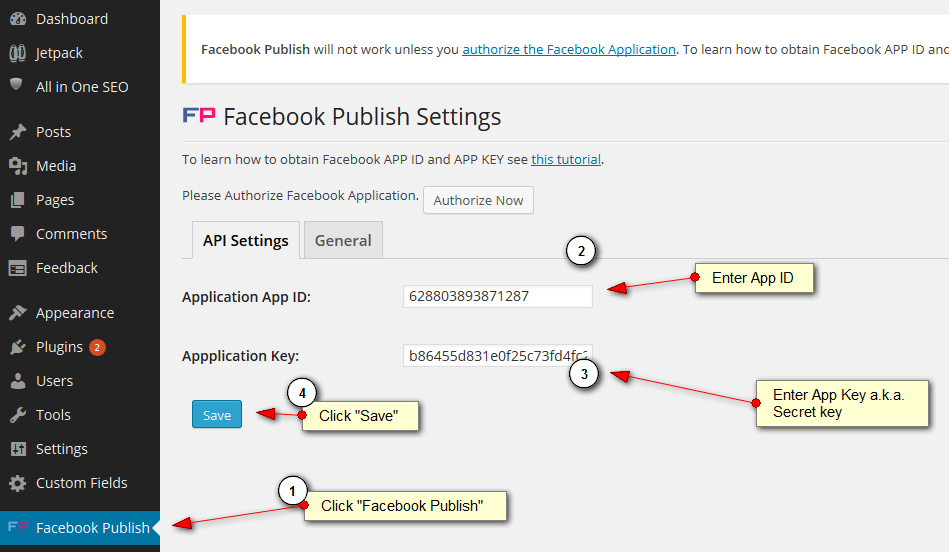
2. Note the App ID and Key that you found in the tutorial above, enter them in the Facebook publish settings page as show below:-
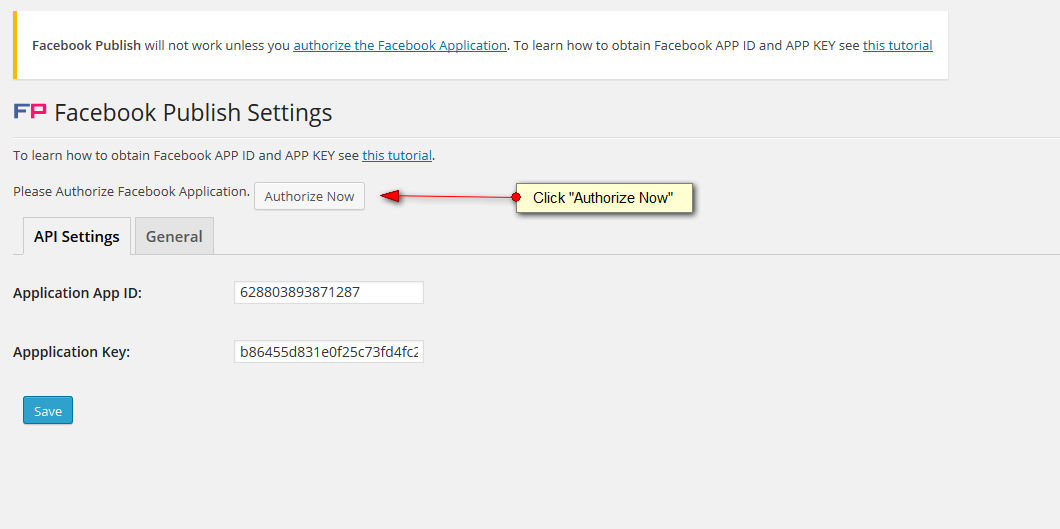
3. After saving the app ID and key we need to authorize Facebook Publish with Facebook. To do so, click on Authorize Now button.
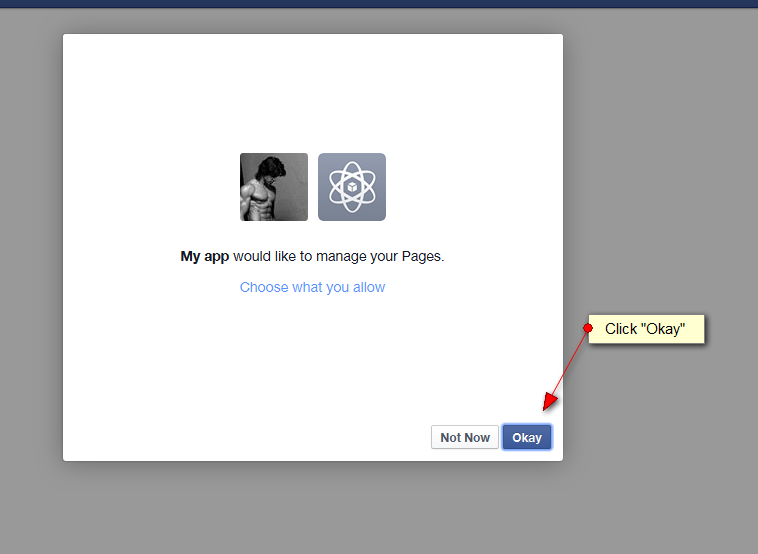
4. Facebook will ask you for the permission, grant by clicking “Okay”.
You will be returned back to the dashboard with the success message, if you don’t get this message please review the above steps once again.
General Setting:-
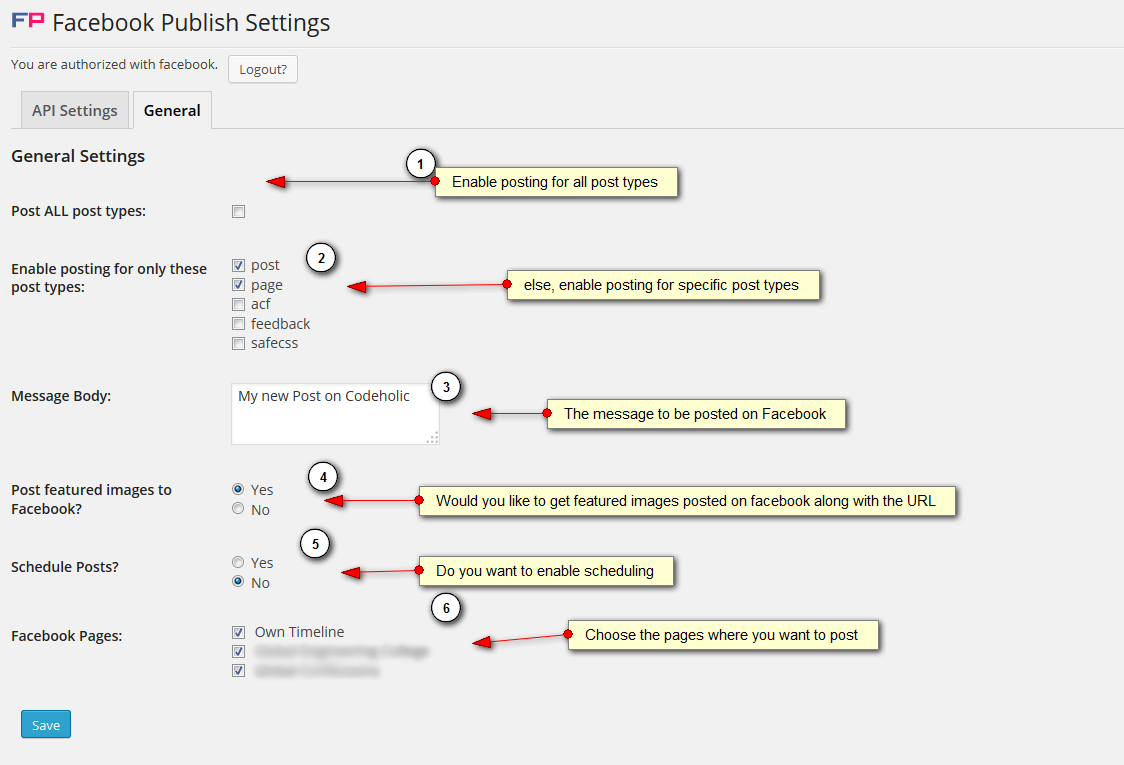
General settings or Global settings are constant for all the post types and single posts in your blog. General settings can be easily overridden on the Add Post screen:-
1. Post ALL post types:- If this option is checked then posting is enabled for all the post types.
2. Enable posting for only these post types:- Else you can choose posting for particular post types. By default, its set to Page and Post.
3. Message Body:- Choose the message to be posted on Facebook along with the URL of post. This can be overridden for particular posts.
4. Post featured images to Facebook:- Check if you want to post featured image of the poast along with the URL.
5. Schedule Posts:- Check if you want to schedule posts. The date/time for the posting will be asked when you add a new post.
6. Facebook Pages:– Choose the Facebook pages where you want the posts to be shared.
Post Specific Settings:-
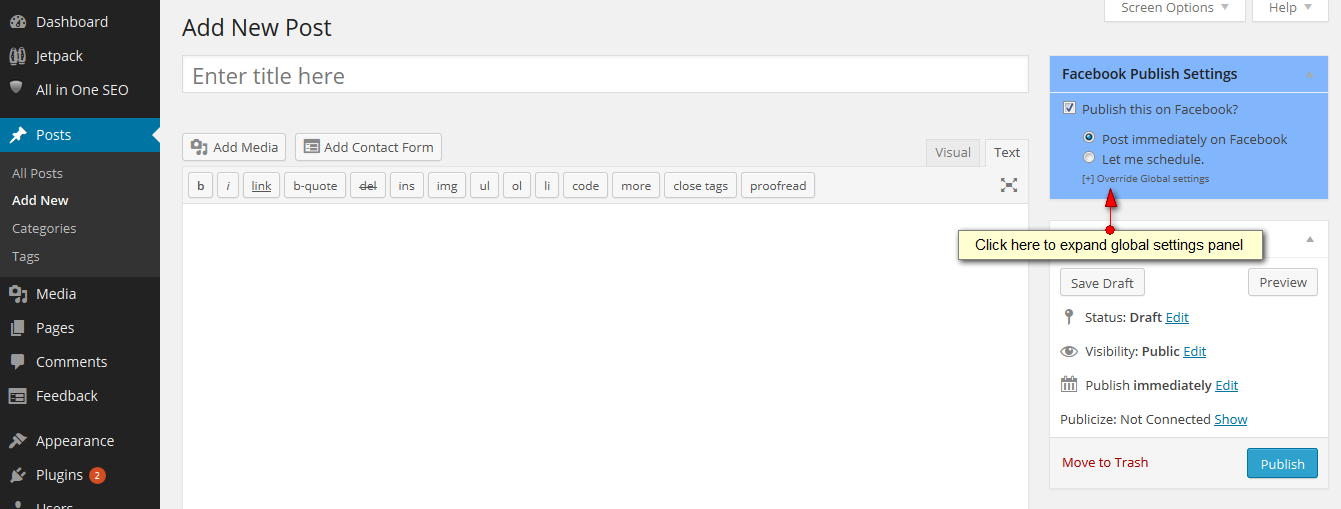
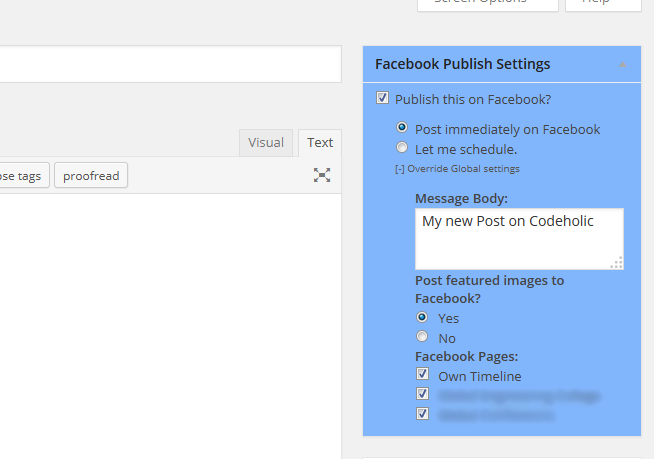
Post specific settings allow you to override the Global/General settings for a particular post. These settings can be found on the right panel of the Add Post screen. Click on the [+] Override Global settings button to see more settings.
From here you can change whatever you had set in the General settings page.
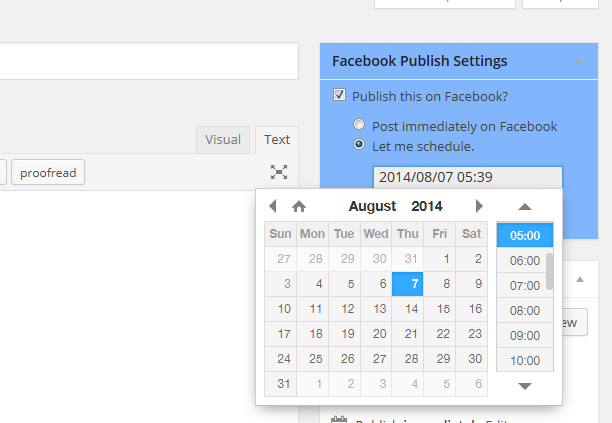
You can even schedule the posts.
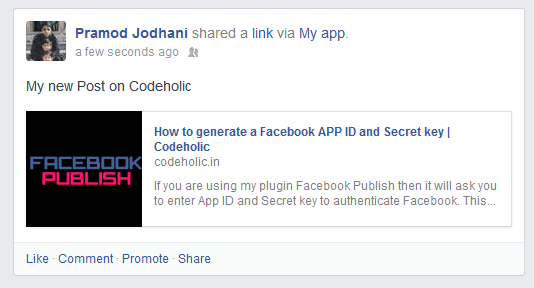
The result:-
Tags
1 Comment
Add comment Cancel reply
You must be logged in to post a comment.


thanks for your tutorial. i already searching for auto post from web to social media….:)