WordPress Yoast SEO setup
Let’s start step-by-step, WordPress Yoast SEO setup.
Yoast SEO is the most comprehensive WordPress SEO Plugin with many built-in tools and features. It is designed to make onsite SEO simple for WordPress users.
How to download and install Yoast on WordPress
The first step is to log in to the backend of your WordPress site. Simply type http://your-site-name/wp-admin
This will take you to the WordPress Dashboard. Now, click on “Plugins.”
Choose “Add New” from the drop-down menu, which will take you to the Plugin store.
Type “Yoast” into the search bar in the upper right corner.
Click the “Install Now” button in the right corner of the Plugin.
– Because WordPress is open-source software, you should always be careful when downloading plugins. Anyone can create them, though WordPress does do a pretty good job of monitoring them.
– Make sure to check the reviews and look for recent updates to ensure any plugin you install is still supported or not.
– After you click Install Now, WordPress will start downloading the Plugin. Now, activate the Plugin.
Once you’ve completed these steps, you are good to go.
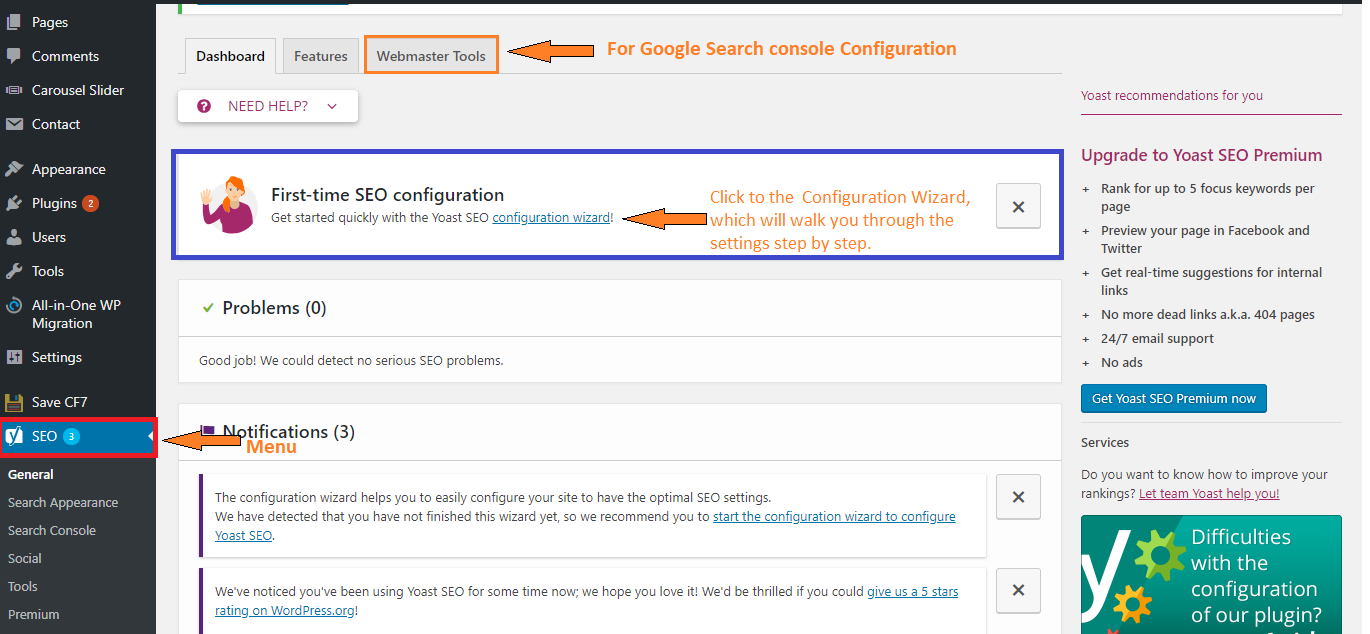
After activation, you will notice a new menu item in WordPress admin bar, labeled as SEO with Yoast SEO logo on it.
You can start with the Configuration Wizard, which will take you through the settings step by step.
YOAST Webmaster Tools Configuration
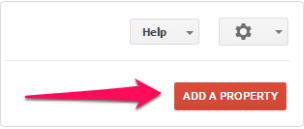
- Go to the Google Search Console site from your browser and then click the red button to add your website.

- Once you click the button to add your site, just type your website URL in the box. Click the ADD button to continue. Please make sure you enter your complete URL.

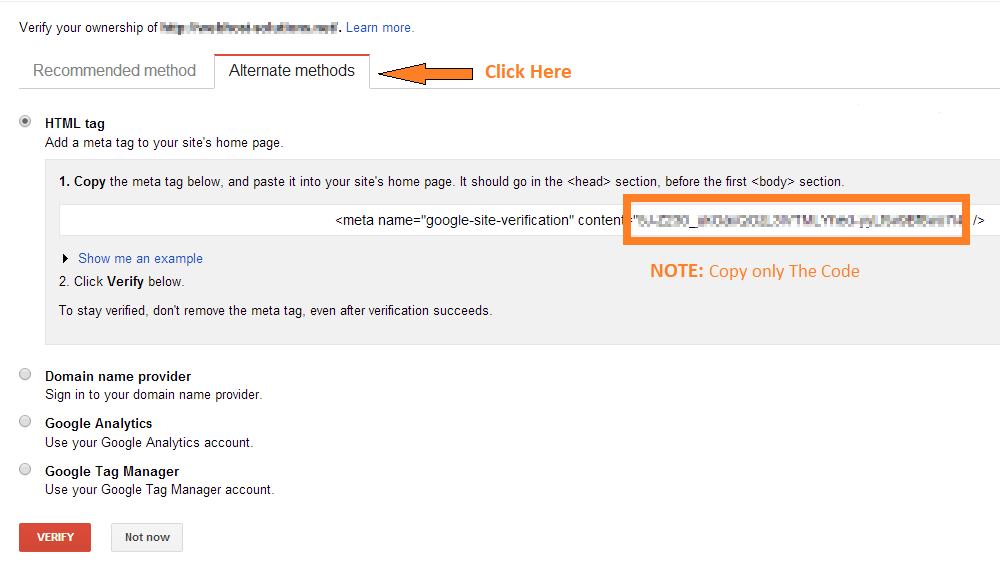
- After that, you will get the Google verification code for the HTML tag under the Alternate Methods tab.

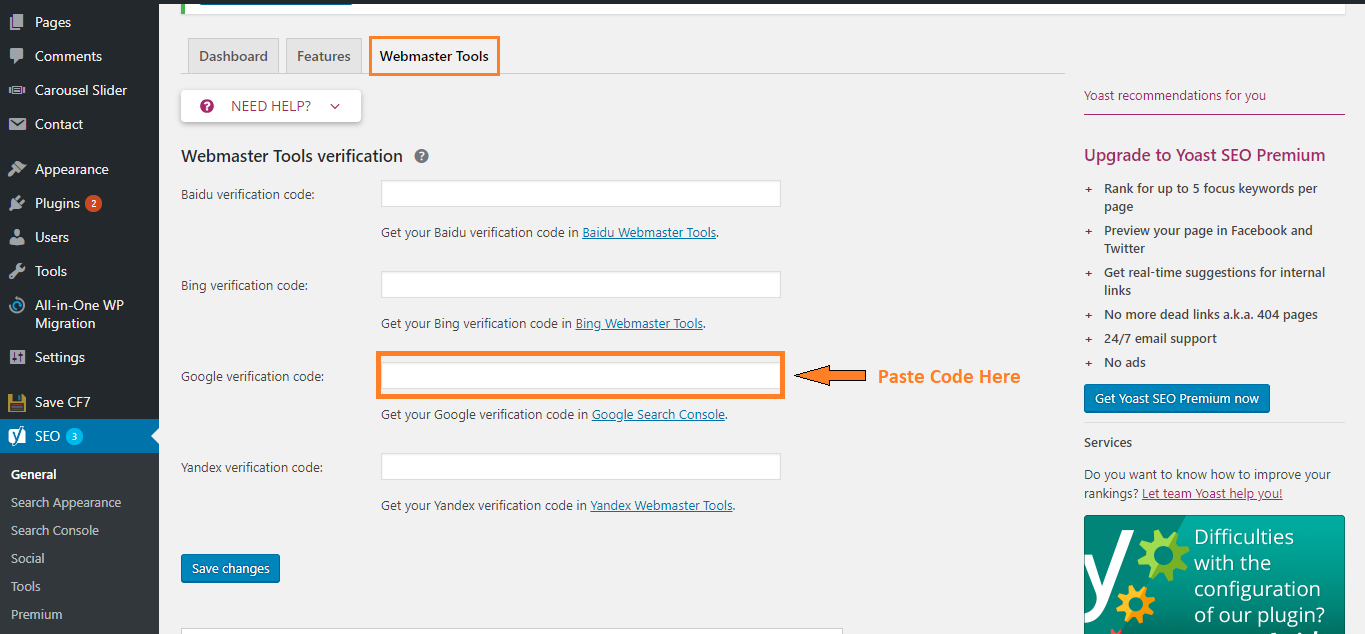
- Come back to the Yoast dashboard and click to the “Webmaster Tools“ tab and then paste the verification code. Click ‘Save Changes’.

Above are some of the useful and powerful SEO tools for site owners of all levels and also it’s easy to use.
Tags
Let’s start step-by-step, WordPress Yoast SEO setup.
Yoast SEO is the most comprehensive WordPress SEO Plugin with many built-in tools and features. It is designed to make onsite SEO simple for WordPress users.
How to download and install Yoast on WordPress
The first step is to log in to the backend of your WordPress site. Simply type http://your-site-name/wp-admin
This will take you to the WordPress Dashboard. Now, click on “Plugins.”
Choose “Add New” from the drop-down menu, which will take you to the Plugin store.
Type “Yoast” into the search bar in the upper right corner.
Click the “Install Now” button in the right corner of the Plugin.
– Because WordPress is open-source software, you should always be careful when downloading plugins. Anyone can create them, though WordPress does do a pretty good job of monitoring them.
– Make sure to check the reviews and look for recent updates to ensure any plugin you install is still supported or not.
– After you click Install Now, WordPress will start downloading the Plugin. Now, activate the Plugin.
Once you’ve completed these steps, you are good to go.
After activation, you will notice a new menu item in WordPress admin bar, labeled as SEO with Yoast SEO logo on it.
You can start with the Configuration Wizard, which will take you through the settings step by step.
YOAST Webmaster Tools Configuration
- Go to the Google Search Console site from your browser and then click the red button to add your website.

- Once you click the button to add your site, just type your website URL in the box. Click the ADD button to continue. Please make sure you enter your complete URL.

- After that, you will get the Google verification code for the HTML tag under the Alternate Methods tab.

- Come back to the Yoast dashboard and click to the “Webmaster Tools“ tab and then paste the verification code. Click ‘Save Changes’.

Above are some of the useful and powerful SEO tools for site owners of all levels and also it’s easy to use.


